Submitting a written text or file upload assessment
| Site: | College of the Rockies - Online |
| Course: | COTROnline Student Help Manual |
| Book: | Submitting a written text or file upload assessment |
| Printed by: | Guest user , |
| Date: | Wednesday, 8 May 2024, 7:27 PM |
Description
This book contains three sections:
Online Text Assignments
For some assignments, you will be typing directly in the assignment window.
Locate the Assignment
Begin by finding the Assignment; if it is not a discussion forum submission, it will have an icon that looks like this: ![]()
You can also locate Assignments by using your Course Dashboard, located via the dashboard icon at the top of your course page and selecting "Assignments".

Click on the assignment title to open it.
Read the Directions
On the landing page, you will find directions for completing the assignment, information about when the assignment is due, and its current status.
You may also find instructions in the course Syllabus or on a separate handout.
If there is a Rubric attached, the Rubric will be displayed on this page.
Add Submission
When you are ready to complete the assignment, click the Add Submission button. This will open up the text editor window.
You will add your response inside the Text Editor window that opens. You can type directly into this box or you can copy and paste content that you have created in a Word document or other word processor.
You may want to complete your submission in a separate word-processor where you can save drafts and make edits. When you select "Save Changes" in the submission window, it will automatically submit!
Your instructor may ask you to add a video here or upload and attach a file. Make sure you understand the submission requirements before submitting!
Save and Submit
Save your changes when you are finished editing your assignment.
- If there is no "Submit Assignment" button, selecting "Save Changes" will automatically submit your assignment.
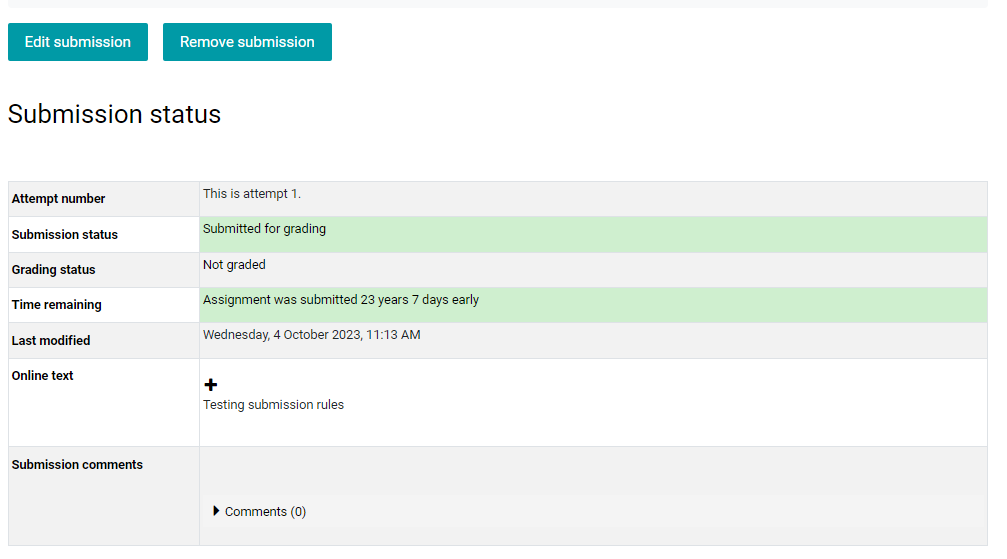
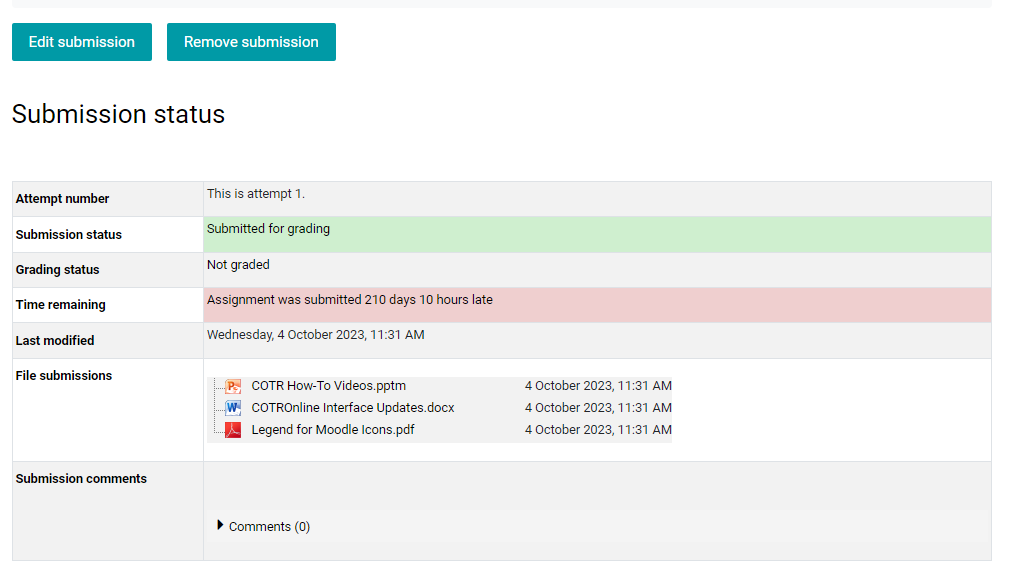
- A screen will be displayed that may look similar to the following image, where you have options to edit or remove your submission
- The Submission Status of a successfully submitted assignment will show Submitted for Grading and will include a copy of your response.
- Please note, some assignments are set up differently and may not have editing functions.
Note: Some assignments will have a separate submit button. You can return and edit your submission provided you don't also click the Submit Assignment button.
You will be asked if you are sure you want to submit your assignment for grading. This is the last opportunity to go back to your assignment and make more changes - this is done by clicking Cancel.
If you are happy with your response, click Continue and this will prompt the final submission window.

This work is licensed under a Creative Commons Attribution 4.0 International License.
Uploading an Assignment File
Some assignments, such as major papers or evaluative projects, require submission of a formal document which must be attached as a submission. The following instructions are to guide the submission of an Assignment File.
Please note: Acceptable file formats are .doc, .docx, .rtf, .txt, .xlsm, .xlsx, .pptx, .pptm, .pdf, .jpg, .png, .bmp, .mp3, .mp4
- Instructors may require a specific file format, example pdf; if this is the case, then you won't be able to upload any other file format
- Maximum file size is a 100 MB standard, though this may be lower depending on what your instructor has set
- Always confirm your assignment instructions before making a submission.
Open Your Assignment Dropbox
- To start, click on the Assignment Title - located in the Assignments list in your dashboard or beside the Assignment icon
 on your Course Homepage
 - The assignment details displayed on the first page will contain the assignment directions, deadline, and submission status. You may have additional instructions provided via the Course Syllabus or a separate Assignment instructions document.
- If there is a rubric, this will display on this page as well.
- Click the Add Submission button when you are ready to upload your assignment file.

Upload your File
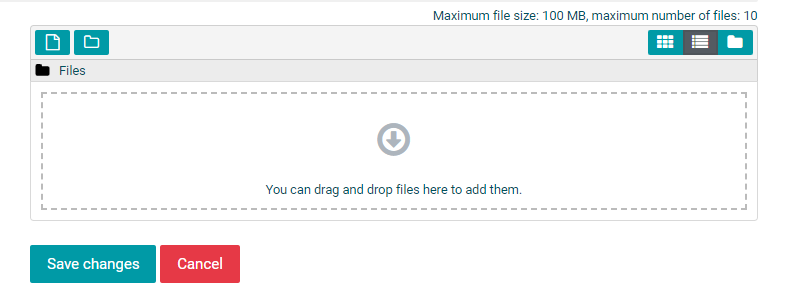
- To add a file, you can click on the Add File icon
 or you can drag and drop your file into the box provided (if you need help, please contact the COTROnline Help Desk - contact information is below)
- The file will display with an appropriate file-type icon if it has been successfully added.
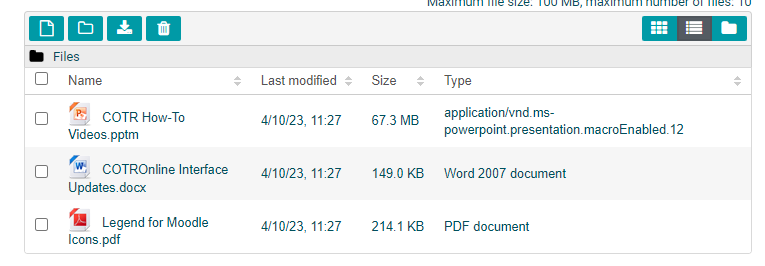
- You can open and download the files from this point as well as delete files and re-upload.
Submit Assignment
- When you are satisfied with your submission, select "Save Changes"
- The Submission Status window will open displaying your submission time and status and grading status.
- You may have the opportunity at this time to Edit Submission or Remove Submission.
- Note: Some instructors will set up a draft submission and "Submit Assignment" button.
- To change the file, click Edit Submission; to submit the file for grading, click Submit Assignment (Note, once you click Submit Assignment, you can not make changes)
Submission Ownership Acknowledgment
- Some assignments require an acknowledgement that the work submitted is your own. To submit your assignment for marking, you must tick the box, if you wish to change your file, click Cancel - this will revert your submission to draft, so you can change your assignment submission.
- Once the ownership statement has been ticked, click the Continue button.
- The assignment Submission Status will now show Submitted for Grading with a Last Modified date showing when you submitted the assignment and the attached file(s)
If you have problems at any point in the assignment submission process, please contact the COTROnline Help Desk.
This work is licensed under a Creative Commons Attribution 4.0 International License.
Creating PDFs
Some Instructors will require your submission to be a PDF. There are several reasons this may be a requirement:
- To prevent upload issues with document formats like PowerPoint or Apple Pages
- To ensure the layout and styles of your document are not changed when opened by a different computer or program
- Ease of file-size upload and download
Save as PDF
- Open the MS Office document you want to publish as a PDF (this can be a .doc, .ppt, .xlxs, etc.)
- Click the File tab
- Select Save As or Save a Copy
- Pick the folder where you want to save the file:
- To save in OneDrive, select the OneDrive folder
- To save on your PC hard-drive, select "This PC"
- Then navigate to your preferred folder (Desktop, Documents, OneDrive, etc.)
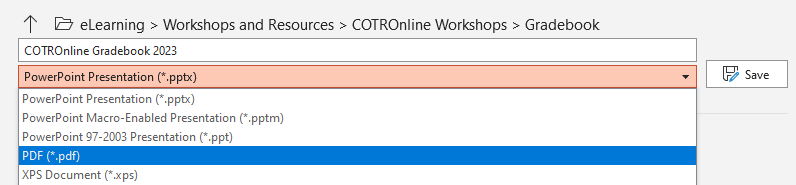
- In the File Name space, type a name for the file (the default will be the original file name)
- In the dropdown list below the file name bar, select PDF
Print to PDF
You can also "Print to PDF" - this allows you to set color/b&w, choose particular pages, etc.
- Open the MS Office document and open the File tab
- Select Print
- Selecting "Microsoft Print to PDF" as your printer
Export as PDF/XPS
You can also use the "Export" function to create a PDF that preserves hyperlinks and other advanced functions
- Open the MS Office Document and open the File tab
- Select Export
- Select "Create PDF/XPS Document" and click on the "Create PDF/XPS" button
Print to PDF
- Open the MS Office document
- Select the File tab/dropdown
- Select Print
- Locate the PDFdropdown in the bottom left corner of the Print window and select "Save as Adobe PDF"

Export to PDF
- Open the Pages document
- Select the File tab/dropdown
- Select Export To and then "PDF" from the secondary dropdown menu
![2022] How to Convert Pages to PDF on Mac/Windows/Online - EaseUS](https://pdf.easeus.com/images/pdf-editor/en/resource/screenshot-convert-pdf-pages.png)
- Select Save
Download PDF
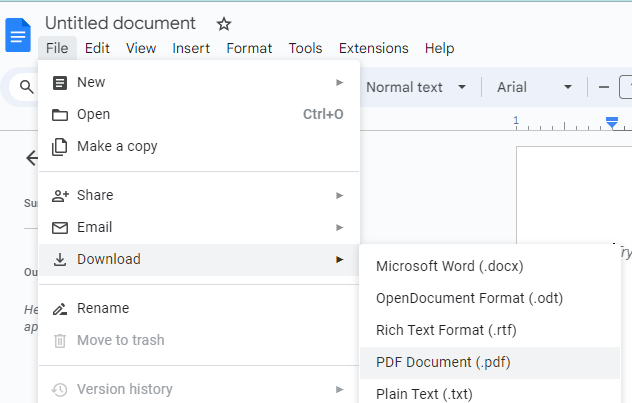
- Open the Google Doc (or Sheet, Slides, etc.) you want to convert.
- Select the File tab/dropdown
- Select Download and then "PDF Document (.pdf)" from the secondary dropdown menu
- This will automatically download to your default downloads folder.